Access RGB Camera
Overview
The RGB camera is a feature that allows you to access the RGB camera images from the XREAL glasses.
You can use this feature to:
- Record a video with the RGB camera
- Access the RGB camera images in real time
- For glasses without RGB accessories, you can also refer to this section to achieve the effect of recording virtual content
Device Compatibility
Currently, only the RGB camera accessory Eye for the XREAL One series glasses supports this feature.
Developer Guide
Import the XREAL SDK and Sample
Ensure your environment is configured as per the Getting Started with XREAL SDK.
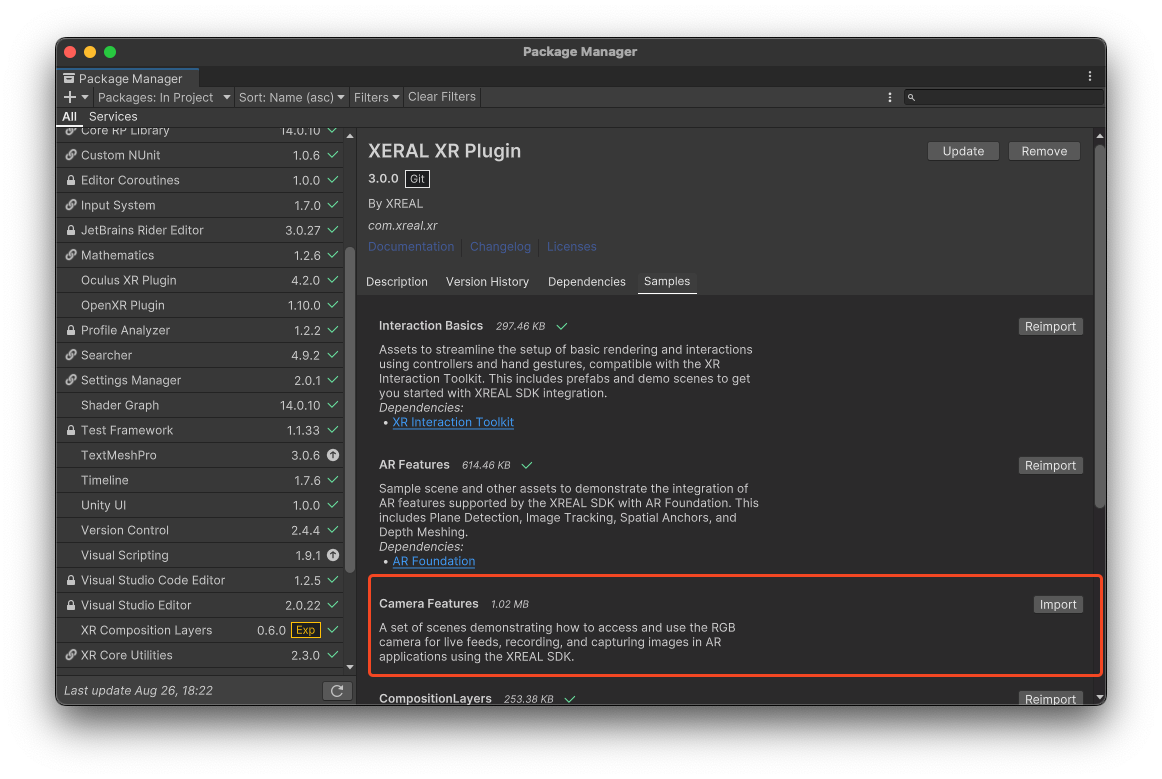
Import the Camera Features sample from the Package Manager.
Open the Sample Scene
Navigate to the RGBCamera sample in the Unity Project window: Assets > Samples > XERAL XR Plugin > 3.0.0 >Camera Features > RGBCamera
How to Access RGB Camera Images
The RGB camera supports YUV_420_888 format.
Retrieving YUV_420_888 Format
For the YUV_420_888 format, use the code below to access and display the Y, U, and V textures:
var yuvTextures = m_RGBCameraTexture.GetYUVFormatTextures ();

if (yuvTextures[0] != null)
{
    m_YUVImage.texture = yuvTextures[0];
    m_YUVImage.material.SetTexture("_UTex", yuvTextures[1]);
    m_YUVImage.material.SetTexture("_VTex", yuvTextures[2]);
}
How to record a video with RGB Camera
You can simply transform the Video gameObject to a prefab and use it in your scene.
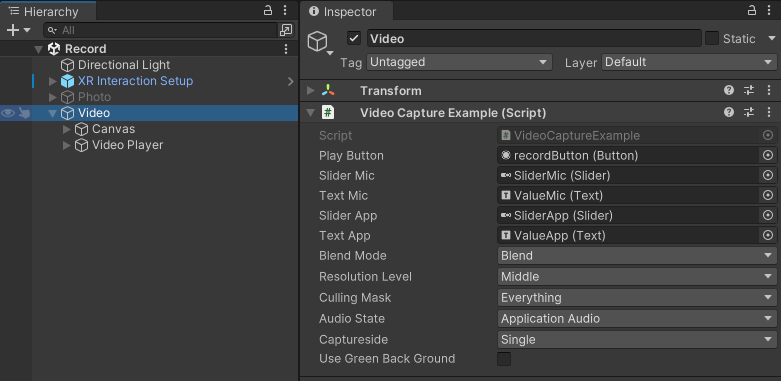
Blend Mode
- Blend: Records both the RGB camera content and the virtual content together.
- RGB Only: Records only the content from the RGB camera.
- Virtual Only: Records only the virtual elements in the video, excluding real-world content.
Resolution Level
- Low: Low resolution, resulting in smaller file sizes and lower quality.
- Middle: Medium resolution, offering a balance between quality and file size.
- High: High resolution, providing the best quality but with larger file sizes.
Culling Mask
- Everything: Renders all layers in the scene, including both the real and virtual elements.
- Nothing: Renders no layers, essentially showing a blank screen.
- Custom Layers: Allows you to specify particular layers to include or exclude in the video capture.
Audio State
- Application Audio: Captures audio solely from the application, excluding microphone input. Useful for recording or streaming in-app sounds and media.
- Mic Audio: Captures audio from the microphone. This setting is typically used for voice recording or picking up ambient sounds from the environment.
- Application and Mic Audio: Captures both the application's audio and microphone input, combining in-app sounds with user or environmental audio.
- None: Disables all audio capture, resulting in a video with no sound.
Capture Side
- Single: Captures video from a single camera, typically the default camera.
- Both: Captures video from two cameras, often used for stereoscopic effects or dual perspectives.
Use Green Background
- Enabled: Replaces the background with a green screen, useful for chroma keying in post-production.
- Disabled: Keeps the original background, displaying the scene as is.
Build and Run the Sample App
You need to add the following two permissions to your Project Setting, otherwise the screen recording will not work.
- RECORD_AUDIO
- FOREGROUND_SERVICE_MEDIA_PROJECTION
- The Previewer is used to preview live images in real time, for debugging purposes. Click the APP key of the controller to show or hide it.
- Click the Start button to start video capture.
- Click the Stop button to stop video capture. It will save the video file to “Application.persistentDataPath” path.